Plan9/Web Server with Go based static site generator Hugo
Notes on how to host websites on 9front with a customised tcp80 web server coupled with tlssrv(8) and acmed(8) for SSL support, and a ported version of Hugo as a static site generator.…
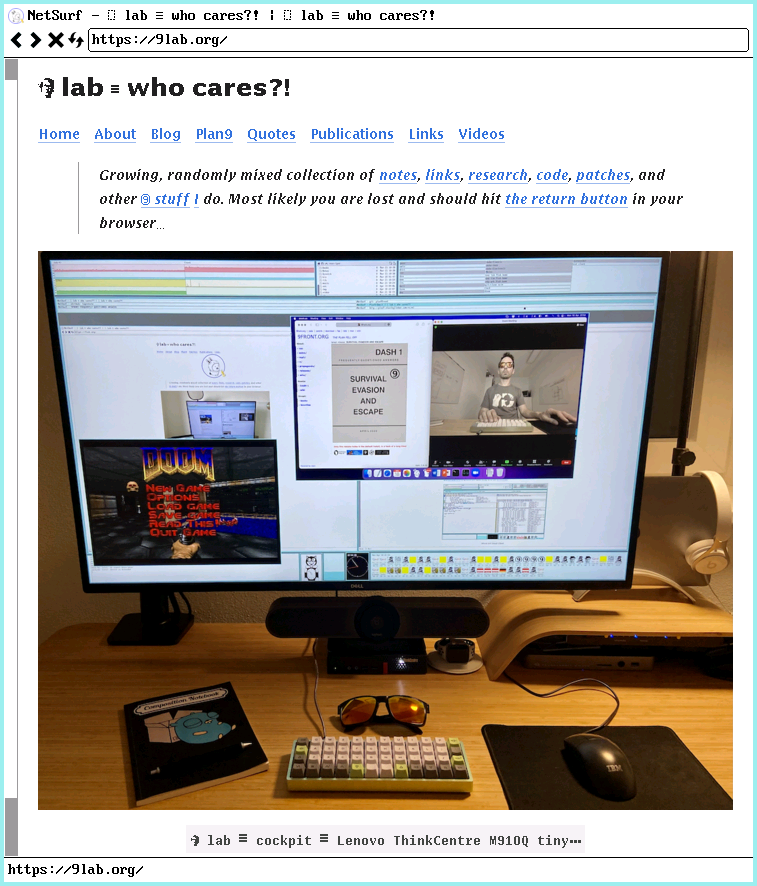
9lab.org website generated with Hugo and served by tcp80 running on 9front
Overview
The following describes my 9front web server setup hosting multiple (i.e. 9lab.org, bytelabs.org) domains. To manage website content I use Hugo, a Go based static site generator, ported to 9front. The web server is a customised variant of cinap’s tcp80. This version of tcp80 is very simple, does not support CGI, and provides Layer 7 (i.e. application layer) HTTP request and user-agent based filtering capabilities via regexp(2).
Web Server
Clone tcp80 web server:
% mkdir -p $home/src
% cd $home/src
% git/clone gits://shithub.us/igor/tcp80
% cd tcp80
…
Configure
The web server is implemented in one relatively simple file, namely tcp80.c. Configuration is done via the same C file; no need to learn new syntax, the only requirement is the ability to parse and modify C code. To enable changes one simply recompiles. Keep it simple, stupid!
Document Root
First, let’s configure how domains map onto directories by searching for the line that starts with Host in tcp80.c:
% ed - tcp80.c <<EOF
  g/^struct Host/  .,+4 n
  g/^Host/ .,+4 n
  Q
EOF
11	struct Host
12	{
13		char	*domain;	/* domain pattern */
14		char	*root;		/* document root */
15	};
50	Host hosts[] = {
51		/* domain,									root */
52		{ "(www\.)?bytelabs\.org",					"/usr/igor/www/bytelabs"	},
53		{ "((www|mux)\.)?9lab\.org",				"/usr/igor/www/9lab/public"	}
54	};
The ed invocation above prints some context around the Host data structure that encodes a domain pattern to document root mapping. The array hosts[] has two entries, (1) the domain 9lab.org mapping to document root /usr/igor/www/9lab/public, and (2) the domain bytelabs.org mapping to document root /usr/igor/www/bytelabs.
Request and User Agent Filtering
A web server is subject to requests that probe for the presence of certain files and features to exploit vulnerabilities. To drop requests for URLs that are not present define the following regexp(2):
% ed - tcp80.c <<EOF
  g/^struct Rule/  .,+4 n
  g/^Rule blockrules/ .,+2 n
  Q
EOF
31	struct Rule
32	{
33		char	*pat;
34		int		act;
35	};
56	Rule blockrules[] = {
57		{ ".*\\.(php|cgi|asp|jsp|cfm|pl)(\\?.*)?$",	Drop	}
58	};
In other words, any request for a .php, .cgi, .asp, … web site will be dropped after decoding the HTTP request header; before attempting to dispatch and handle the request. The implementation is quite harsh, it simply hangs up, there is no 404 error status.
Sometimes User-Agent’s vex ones web server with random requests in search for exploitable vulnerabilities. They too can be blocked using regexp(2) that is matched against the User-Agent HTTP header field:
% ed - tcp80.c <<EOF
  g/^struct Rule/  .,+4 n
  g/^Rule blockagents/ .,+2 n
  Q
EOF
31	struct Rule
32	{
33		char	*pat;
34		int		act;
35	};
60	Rule blockagents[] = {
61		{ ".*cyberscan\\.io.*", Drop	}
62	};
The above drops any connection from User-Agent’s matching .*cyberscan\\.io.*.
Sandboxing
Before dispatching a request, the web server creates a secure and minimal sandbox in /usr/web via the function box() using bind(2) as follows:
% ed - tcp80.c <<EOF
  g/^box/ -1,. n
  /^{/,/^}/n
  Q
EOF
632	int
633	box(void)
634	{
635		char *r;
636
637		if(bind("/sys/log/tcp80", "/usr/web/sys/log/tcp80", MREPL) < 0)
638			return 0;
639		if(bind("/env/timezone", "/usr/web/env/timezone", MREPL) < 0)
640			return 0;
641		if(bind("/dev/sysname", "/usr/web/dev/sysname", MREPL) < 0)
642			return 0;
643		if(nelem(hosts) > 0){
644			r = findhost(host);
645			if(r){
646				if(bind(r, "/mnt/web", MREPL) < 0)
647					return 0;
648				if(bind("/mnt/web", "/usr/web", MBEFORE) < 0)
649					return 0;
650			}
651		}
652		if(bind("/usr/web", "/", MREPL) < 0)
653			return 0;
654		if(rfork(RFNOMNT) < 0)
655			return 0;
656		return 1;
657	}
Bind(2) modifies the file name space of the current process. The above pulls in a minimal set of files required for the web server to function, followed by an rfork(2) call using RFNOMNT to disallow subsequent mounts into the new name space.
Request Handling
The below fragment of tcp80.c code highlights the key sequence of steps involved in request handling, namely (1) Layer 7 filtering, (2) sandbox setup, followed by (3) request dispatch:
void
main(int argc, char **argv)
{
	…
	while((n = read(0, p, e - p)) > 0){
		p += n;
		while((p > buf) && (e = memchr(buf, '\n', p - buf))){
			…
			if(*line == 0){
				if(!method[0])
					return;
				if(block())  /* (1) exit early if request or user-agent filters match */
					return;
				if(!box())   /* (2) create document root sandbox */
					return;
				if(dispatch())  /* (3) dispatch request */
					return;
				…
			}
		}
		e = buf + sizeof(buf);
	}
}
Environment
To initialise a webroot sandbox a few files and folders with appropriate properties and permissions need to be created as hostowner:
% echo create /usr/web             glenda glenda 005 d >>/srv/cwfs.cmd
% echo create /usr/web/dev         glenda glenda 555 d >>/srv/cwfs.cmd
% echo create /usr/web/env         glenda glenda 555 d >>/srv/cwfs.cmd
% echo create /usr/web/sys         sys    sys    775 d >>/srv/cwfs.cmd
% echo create /usr/web/sys/log     sys    sys    775 d >>/srv/cwfs.cmd
% echo create /usr/web/.well-known glenda glenda 777 d >>/srv/cwfs.cmd
The hostowner differs from the concept of root on a UNIX system, where a single user root has control of all processes and files on the system. By contrast, even the hostowner of a Plan 9 file server cannot violate file permissions on the file server, except when permissions checking is disabled on the console or when entering special commands at the console of the file server. Note: the above is the equivalent of working at the console of the file server.
Next, a webserver log file is created using the a (i.e. append only) flag:
% echo create /sys/log/tcp80 sys sys 662 a >>/srv/cwfs.cmd
If your websites are popular, web logfiles grow quickly; hence some form of log rotation is required:
% cd $home/src
% git/clone gits://shithub.us/garden/logrotate
% cd logrotate
The following modifications have been applied to ensure log files are marked as temporary files (i.e. +t parameter to chmod(1) ) to avoid backup to a WORM:
% git/diff
diff 7b390e5368973a5b162cc63a8db7bb6ee85cff14 uncommitted
--- a/logrotate
+++ b/logrotate
@@ -2,10 +2,10 @@

 #
 # edit these 4 variables to your preference
-# 0	0 * * 0 $sysname /usr/glenda/bin/logrotate
+# 0	0 * * 0 $sysname /usr/igor/src/logrotate/logrotate
 #
 logdir=/sys/log
-logfiles=(auth cpu cron dns gemini httpd/log listen mail runq smtp smtp.fail smtpd)
+logfiles=(auth cpu cron dns listen mail runq smtp smtp.fail smtpd tcp80 www)
 generations=14
 maxsize=1024000

@@ -21,14 +21,16 @@
 		if(test -f $logdir/$1.$pgen.gz){
 			cp $logdir/$1.$pgen.gz $logdir/$1.$gen.gz
 			chmod 0700 $logdir/$1.$gen.gz
+			chmod +t $logdir/$1.$gen.gz
 		}
 		gen=$pgen

 	}
 	gzip -c $logdir/$1 > $logdir/$1.0.gz
+	chmod +t $logdir/$1.0.gz
 	chmod -a $logdir/$i
 	>$logdir/$i
-	chmod +a $logdir/$i
+	chmod +at $logdir/$i
 }

 for(i in $logfiles){
To run log rotation in regular intervals (i.e. every 30 minutes), setup cron(8) as follows:
% auth/cron -c
% cat /cron/$user/cron
# rotate logs in /sys/log
0,30 0-23 * * * local /usr/igor/src/logrotate/logrotate
Build and Install
Web server build and installation:
% cd $home/src/tcp80
% mk
6c -FTVw tcp80.c
6l  -o 6.out tcp80.6
% mk install
6l  -o 6.out tcp80.6
cp 6.out /amd64/bin/tcp80
Web Site
Before we continue with further web server setup, let’s get everything in place for generating our website using Hugo.
Install Hugo
Hugo is a static HTML and CSS website generator written in Go used to create web pages. See build and install Go for instructions on how to install Go on 9front.
After installing Go, go install a version of Hugo ported to 9front:
% mkdir -p $home/src
% cd $home/src
% git/clone  git://shithub.us/igor/hugo ; cd hugo
…
% go install
go: downloading github.com/alecthomas/chroma v0.8.2
go: downloading github.com/bep/debounce v1.2.0
go: downloading github.com/1g0rb0hm/fsnotify-shim v0.0.0
go: downloading github.com/pkg/errors v0.9.1
go: downloading github.com/1g0rb0hm/afero v1.1.3-0.20201204110253-759225cfc85a
…
go: downloading github.com/hashicorp/golang-lru v0.5.1
go: downloading github.com/shurcooL/sanitized_anchor_name v1.0.0
go: downloading github.com/golang/protobuf v1.3.2
go: downloading github.com/tdewolff/parse/v2 v2.4.2
go: downloading github.com/evanw/esbuild v0.8.17
Let’s check if we can invoke hugo after installation:
% hugo -h
hugo is the main command, used to build your Hugo site.

Hugo is a Fast and Flexible Static Site Generator
built with love by spf13 and friends in Go.

Complete documentation is available at http://gohugo.io/.

Usage:
  hugo [flags]
  hugo [command]
…
Create Site
To create a new site (i.e. skeleton) run the following:
% mkdir $home/www ; cd $home/www
% hugo new site 9lab
Congratulations! Your new Hugo site is created in /usr/igor/www/9lab.

Just a few more steps and you're ready to go:

1. Download a theme into the same-named folder.
   Choose a theme from https://themes.gohugo.io/ or
   create your own with the "hugo new theme <THEMENAME>" command.
2. Perhaps you want to add some content. You can add single files
   with "hugo new <SECTIONNAME>/<FILENAME>.<FORMAT>".
3. Start the built-in live server via "hugo server".

Visit https://gohugo.io/ for quickstart guide and full documentation.
Add Theme
There exist a large number of themes for Hugo. The Hugo bear blog theme is used in this example:
% cd $home/www/9lab
% ls
archetypes
config.toml
content
data
layouts
static
themes
term% git/clone https://github.com/janraasch/hugo-bearblog.git themes/hugo-bearblog
…
term% ls themes/hugo-bearblog/
themes/hugo-bearblog/.git
themes/hugo-bearblog/.github
themes/hugo-bearblog/.gitignore
themes/hugo-bearblog/.jsbeautifyrc
themes/hugo-bearblog/LICENSE
themes/hugo-bearblog/README.md
themes/hugo-bearblog/archetypes
themes/hugo-bearblog/exampleSite
themes/hugo-bearblog/images
themes/hugo-bearblog/layouts
themes/hugo-bearblog/package-lock.json
themes/hugo-bearblog/package.json
themes/hugo-bearblog/theme.toml
Configure Site
To configure your Hugo site edit the file config.toml to your liking, here an example:
% cat config.toml
baseURL = "/"
theme = 'hugo-bearblog'
title = "⑨ lab ≡ who cares?!"
author = "Igor Böhm"
copyright = "Copyright © 2021, Igor Böhm."
languageCode = "en-uk"
enableRobotsTXT = true
disableKinds = ["taxonomy"]
ignoreErrors = ["error-disable-taxonomy"]
[permalinks]
  blog = "/:slug/"
  tags = "/blog/:slug"
[params]
  description = "Not exactly sure what this is…"
  favicon = "favicon-32x32.png"
  title = "⑨ lab ≡ who cares…"
  hideMadeWithLine = true
Create Page
Let’s create a new page with the following content:
% hugo new blog/plan9-propaganda.md
/usr/igor/www/9lab/content/blog/plan9-propaganda.md created
…
% cat content/blog/plan9-propaganda.md
---
title: "Plan9/Propaganda"
date: 2022-12-27T00:49:40+01:00
draft: false
tags: [
    "Plan9",
    "9front",
]
---

# Nein! Nein! Nein! Nein! …

{{< youtube tFQua-396h8 >}}

> “In a democracy it is necessary that people should learn to endure having their sentiments outraged.” — Bertrand Russel.
The above example uses markdown as it is more readable and maintainable than HTML.
Next, let hugo generate the static HTML page:
% hugo
Start building sites …

                   | EN
-------------------+-----
  Pages            | 11
  Paginator pages  |  0
  Non-page files   |  0
  Static files     |  0
  Processed images |  0
  Aliases          |  0
  Sitemaps         |  1
  Cleaned          |  0

Total in 59 ms
Here is what the generated web site looks like rendered in a browser:
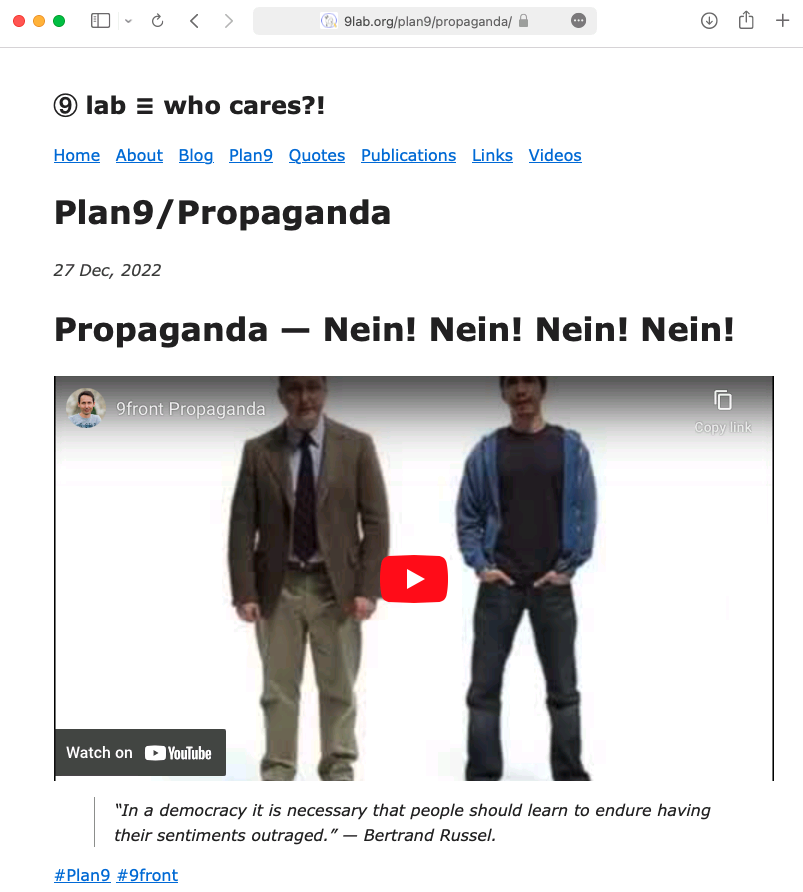
9front propaganda website generated with Hugo served by tcp80 running on 9front
Listen for Requests
HTTP port 80
To listen(8) on http port 80 for requests modify the file /bin/service/!tcp80 as follows:
% cat /bin/service/!tcp80
#!/bin/rc
exec /bin/tcp80 `{cat $3/remote}>>[2]/sys/log/tcp80
To enable the service drop the exclamation mark from !tcp80:
% mv /bin/service/!tcp80 /bin/service/tcp80
% pstree | grep listen | grep !80
478         │├listen [/net/tcp/2 tcp!*!80]
At last, let’s try to access the generated website:
Open 9lab.org website generated with Hugo and served by tcp80 running on 9front (animated GIF)
HTTPS port 443
The easiest way to fetch and renew a TLS certificate on 9front is via acmed(8) (thanks Ori).
Initially an account key must be generated:
% ramfs -p ; cd /tmp
% auth/rsagen -t \
    'service=acme role=sign hash=sha256 acct=igor@9lab.org' \
    >account.key
% auth/rsa2jwk account.key \
    >/sys/lib/tls/acmed/igor@9lab.org.pub
The account.key must be loaded into factotum(4); however, it is best to store it in secstore(1) instead of storing it unencrypted on the file system:
% auth/secstore -g factotum
secstore password:
% cat account.key >> factotum
% auth/secstore -p factotum
secstore password:
% read -m factotum > /mnt/factotum/ctl
Please consult the secstore(1) man page as well as the excellent 9front FQA secstore documentation if the above doesn’t make sense or doesn’t work for you.
Next, generate rsa(8) key (i.e. certificate.key) and certificate signing request (i.e. mux.9lab.org.csr) files:
% auth/rsagen -t 'service=tls role=client owner=*' \
    >certificate.key
% auth/rsa2csr 'CN=mux.9lab.org' certificate.key \
    >/sys/lib/tls/acmed/mux.9lab.org.csr
Again, you are urged to store the rsa(8) key in secstore(1):
% auth/secstore -g factotum
secstore password:
% cat certificate.key >> factotum
% auth/secstore -p factotum
secstore password:
% read -m factotum > /mnt/factotum/ctl
See rsa(8) and tlssrv(8) for more examples on how to use RSA keys.
Finally, the certificate for your domain can now be fetched. This requires webfs(4) to be mounted as the ACME protocol uses HTTP to talk to the provider.
% webfs
% auth/acmed igor@9lab.org /sys/lib/tls/acmed/mux.9lab.org.csr \
    >/sys/lib/tls/acmed/mux.9lab.org.crt
The above incantation is also used to renew the certificate.
Let’s display the certificate:
% auth/pemdecode 'CERTIFICATE' /sys/lib/tls/acmed/mux.9lab.org.crt | auth/x5092pub
key proto=rsa size=2048 ek=… n=… subject=mux.9lab.org
At last, to listen(8) on https port 443 for requests modify the file /bin/service/tcp443 as follows:
% cat /bin/service/tcp443
#!/bin/rc
exec /bin/tlssrv -c/sys/lib/tls/acmed/mux.9lab.org.crt -ltcp80 -r`{cat $3/remote} /bin/tcp80 `{cat $3/remote}>>[2]/sys/log/tcp80
Summary
Secure hosting and website content management is achieved through a combination of simple tools on 9front. The key is to wrap your head around the basic concepts of:
- configuring and running a web server service (i.e.
/bin/service/tcp80,/bin/service/tcp443) - using acmed(8) to fetch and renew TLS certificates
- using a ported version of Hugo to manage your website content
The above is a simple yet fully functional setup and only scratches the surface of what one can do on 9front in terms of serving HTML content.
Appendix
There are many interesting webserver solutions on 9front.
The default is rc-httpd(8), written entirely in rc(1), serving requested files or an index of files found under a website’s root directory, or, in the case of CGI, executes a specified CGI program.
There are many variations of cinap’s tcp80 webserver that can be found on shithub.us. I have taken most of my inspiration from the variation of tcp80 found here.
Howbeit, my favourite tcp80 implementation is written entirely in awk(1) by umbraticus.